


Table of Contents
Step-by-Step Patio Installation Guide for Beginners
1. Planning Your Patio
Define Its Purpose
Shape and Size
Location
Material Options
The material you choose sets the tone for your patio’s overall look, cost, and durability:
Concrete Pavers – Affordable and versatile, concrete pavers come in multiple shapes, sizes, and finishes. They’re easy to replace if damaged and can mimic stone or brick at a lower price point.
Natural Stone – Provides a timeless, upscale aesthetic with unique textures and color variations. While beautiful, stone can be more expensive and requires skill to cut and fit properly.
Brick Pavers – Offer a warm, traditional charm that works well in historic or cottage-style homes. They’re extremely durable but may need more maintenance to prevent weeds from growing in joints.
When choosing, balance budget, maintenance level, and style preference to find the right fit.
💡 Pro Tip
2. Preparing the Site
Mark the Area
Check Utilities
Excavate Deep Enough
Create Proper Slope
3. Building a Strong Base
4. Adding Bedding Sand
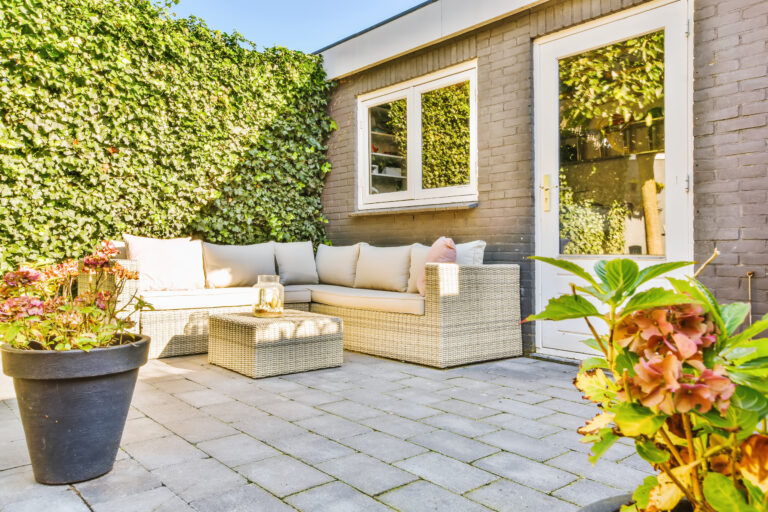
5. Laying Pavers
6. Securing and Finishing
Cost Considerations
Common Mistakes to Avoid
FAQs
For a small 10’×12’ patio, expect 2–3 full days if working with 2 people. Larger patios or complex patterns may take longer.
Sealing is optional, but it enhances color, reduces stains, and helps joint sand stay in place. It also makes cleaning easier and extends the life of your patio.
No—skipping the gravel base can cause shifting, uneven settling, and drainage issues. A proper base is essential for stability and long-term durability.
Basic tools include a shovel, plate compactor, level, rubber mallet, straightedge for screeding, and masonry saw for cutting pavers. Renting specialized tools like a sod cutter or compactor can save time and effort.
Aim for about ¼ inch drop per foot away from your house. This prevents water from pooling on the patio or near your foundation.
Yes, but it requires extra excavation, grading, and sometimes retaining walls to create a level surface and proper drainage.
Use polymeric sand for joints and compact it thoroughly. Sealing the patio also helps reduce weed growth.
Regular maintenance is minimal: sweeping debris, occasionally replenishing joint sand, and resealing every 2–3 years if you choose to seal.