
Table of Contents
Step-by-Step Guide to Laying Sod
1) Measure and Plan
Before ordering sod, it’s essential to accurately measure your lawn area. Using a tape measure or a measuring wheel, determine the length and width of the space where you plan to lay the sod. For irregularly shaped areas, divide the yard into simple geometric sections (such as rectangles and triangles), then calculate the area of each section.
Once you have the total square footage, order your sod. It’s recommended to add about 5-10% extra sod to account for trimming around curves and obstacles. Ordering fresh sod is crucial, as older sod may not root properly. The sod should be delivered as close to your installation time as possible, ideally on the same day. If sod sits for too long, it can dry out or even begin to decompose, reducing its chances of success.
Choosing the Right Type of Sod: Consider your region’s climate and the specific conditions of your yard (such as shade and sun exposure) when selecting the type of sod. Popular grass varieties include:
- Kentucky Bluegrass: Ideal for cooler climates; it’s known for its fine texture and rich green color.
- Bermuda Grass: Thrives in warm, sunny regions; it’s drought-tolerant and durable, making it ideal for high-traffic areas.
- Fescue: A versatile, cool-season grass that tolerates shade better than most other varieties.
2) Prepare the Soil
Soil preparation is the most critical step in sod installation and significantly affects how well the grass establishes itself. Proper preparation ensures that the sod roots deeply and has access to the nutrients and water it needs.
- Clear the Area: Start by removing any existing grass, weeds, or debris from the area. You can use a sod cutter for large areas, which cuts the old grass and roots from the soil. For smaller areas, a shovel or hoe will work, though it’s more labor-intensive. Be sure to clear all plant material to prevent it from competing with the new sod.
- Loosen the Soil: Once the area is clear, use a rototiller or garden fork to loosen the soil to a depth of about 6-8 inches. This step helps aerate the soil, allowing the sod roots to penetrate more easily and encouraging proper drainage. In compacted or clay-heavy soils, this step is particularly important to prevent water pooling and poor root development.
- Test and Amend the Soil: It’s a good idea to test your soil’s pH and nutrient levels to ensure optimal conditions for your sod. You can purchase a simple soil test kit at any garden center, or send a sample to a local extension office for more detailed results. Most grass types prefer slightly acidic soil with a pH between 6.0 and 7.0.
- If your soil is too acidic (pH below 6.0), you can add lime to raise the pH.
- If the soil is too alkaline (pH above 7.0), adding sulfur will lower the pH.
Also, consider adding compost or topsoil to enrich the soil with organic matter, improve soil structure, and increase water retention. Incorporate the amendments into the soil by tilling them in.
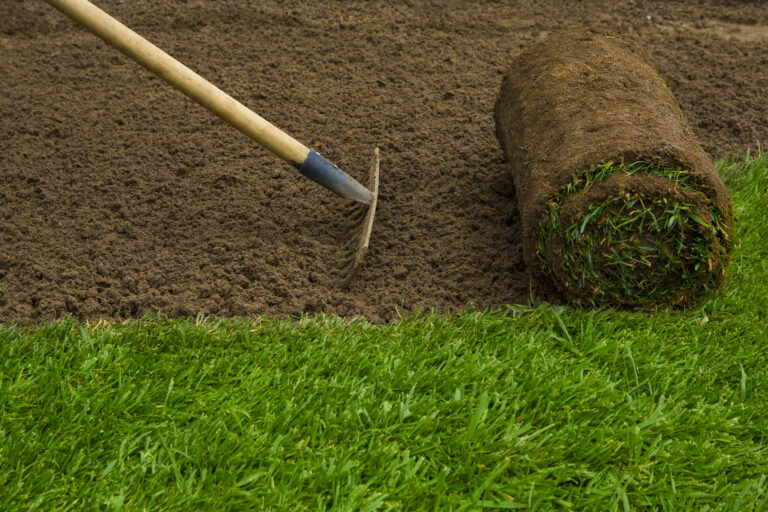
Level the Ground: After amending the soil, use a rake to level the surface. A smooth, even surface ensures the sod lays flat and establishes good contact with the soil below. Make sure there are no low spots where water can accumulate, which can lead to soggy patches and root rot. For large areas, using a lawn roller (filled halfway with water) can help compact and level the soil before laying sod.
Apply Fertilizer: Apply a high-phosphorus starter fertilizer to the soil to promote strong root development. Follow the manufacturer’s instructions on the amount and method of application. Starter fertilizers are specially formulated to provide the nutrients new sod needs during its early growth phase, particularly phosphorus, which supports root establishment.
3) Lay the Sod
Now that your soil is prepped, you’re ready to begin laying the sod. To ensure success, follow these best practices:
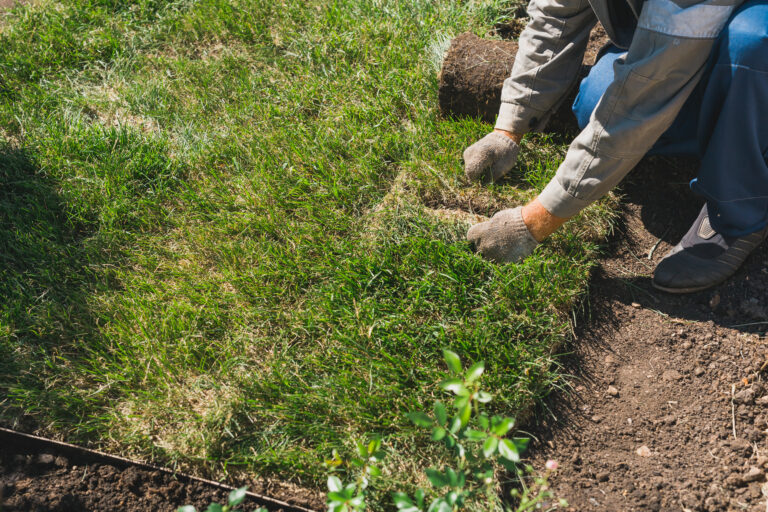
Start at a Straight Edge: Begin laying sod along a straight edge, such as a driveway, sidewalk, or fence line. If your lawn has no clear edge, use a string line to create a straight guideline. This will help keep your rows even and straight.
Lay Each Piece Tightly: Lay each piece of sod flat on the soil, ensuring that the edges are tightly butted together without overlapping. Gaps between the pieces can dry out the edges, leading to poor root establishment and visible seams. You can use your hands to press the edges of each piece together gently.
Stagger the Seams: Lay the sod in a brick-like pattern, staggering the seams of each row like you would when laying bricks. This minimizes erosion, ensures better coverage, and creates a more seamless look once the sod takes root.
Trim Around Obstacles: Use a sharp knife to trim around obstacles like trees, flower beds, or walkways. Make clean, precise cuts to ensure the sod fits snugly around these areas. Avoid creating small or narrow pieces, as they can dry out more quickly and are harder to root.
Sod Slopes Properly: If your yard has a slope, lay the sod across the slope (perpendicular) to reduce the risk of erosion or slipping. You may also want to use landscape staples to secure the sod in place on steeper slopes.

4) Press the Sod Down
To ensure good contact between the sod and the soil, press it down after installation. This step helps eliminate any air pockets and improves root-to-soil contact, which is vital for the sod to establish itself.
- Lawn Roller: Using a lawn roller filled halfway with water is the best way to press the sod down. The roller’s weight helps the sod settle into the soil, ensuring that the roots come into contact with the soil for better moisture absorption.
- Manual Method: If you don’t have a lawn roller, you can carefully walk over the sod with flat-soled shoes, applying even pressure across the lawn.
5) Water the Sod
Proper watering is perhaps the most critical aspect of sod care in the first few weeks. New sod needs consistent moisture to take root and avoid drying out. Here’s how to water your new sod:
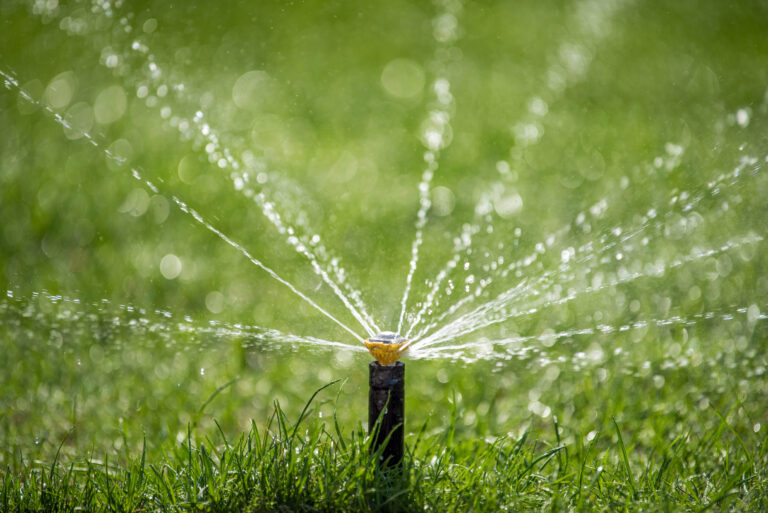
Water Immediately: As soon as you’ve finished laying the sod, water it thoroughly. The first watering should be deep enough to soak the soil down to about 4-6 inches. This helps the roots begin the bonding process with the soil below.
Frequent Watering for the First 2 Weeks: For the first 7-14 days, water the sod frequently to keep it consistently moist. This may require watering 2-3 times per day, depending on the weather and soil conditions. Avoid overwatering, which can cause soggy patches and promote disease, but make sure the sod never dries out during this period.
Gradually Reduce Watering: After about 2-3 weeks, the sod should begin to establish roots in the soil. At this point, reduce watering to once a day and eventually transition to a normal watering schedule, usually 1-2 inches of water per week. Water early in the morning to minimize evaporation and ensure the grass has enough moisture throughout the day.
6) Maintain Your New Lawn
After the first few weeks, your sod will begin to root into the soil, and your lawn will be ready for light use and maintenance. Here’s what to keep in mind as your sod becomes established:
- Avoid Foot Traffic: Minimize walking on the new sod for at least the first 2-3 weeks. Excessive foot traffic can disturb the rooting process and damage the sod before it has a chance to fully establish itself.
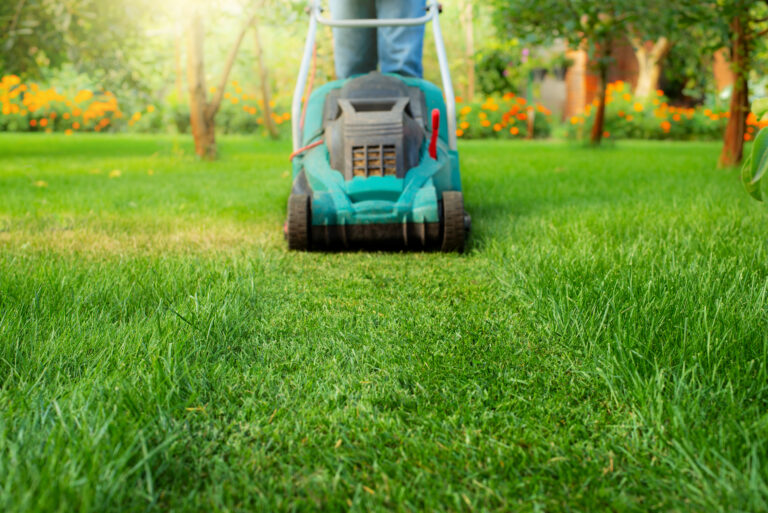
- Mow for the First Time: Once the grass reaches a height of about 3-4 inches, it’s time for the first mow. Set your mower to its highest setting to avoid cutting too much of the blade at once. Cutting more than one-third of the grass blade can stress the lawn and slow its growth.
- Fertilize After Root Establishment: After about 4-6 weeks, when the sod is fully rooted, apply a balanced fertilizer to help maintain healthy growth. Follow the manufacturer’s instructions for application, and avoid over-fertilizing, which can lead to excessive growth and other issues.
- Weed Control: Avoid using herbicides or weed killers on your new sod until it is fully established, which can take 3-4 months. Early use of chemicals can damage the new grass and hinder root growth. Instead, hand-pull any weeds that appear. If you’d like to explore more about this topic, read our blog 17 Lawn and Garden Weeds: How to Identify and Control Them