Table of Contents
If you’re reading this article, chances are good that you’ve decided that dirt needs to be moved around on your property. So you’ve identified a problem but what’s the solution? This article will suggest 7 ways to efficiently dig a trench. But before we look at methods for digging trenches, we should first consider reasons for digging and the importance of correct dimensions. We will also need to investigate two digging methods and answer questions regarding soil conditions and prep work.
6 Reasons Why You May Need to Dig
Nobody just wakes up one morning with the thought, “I think I want to do some digging today”. Digging is usually a solution, but what’s the underlying problem that needs to be solved? Below are 6 of the most common reasons why residential homeowners may need to undertake the laborious task of hand digging.
1. Water Flooding Basement
Nothing sends shivers down the spine of a homeowner more than seeing that your basement has been flooded with water. All sorts of costly damages occur when this happens, but how did the water enter the house in the first place? Although options may vary, the most common explanation is that the grading around the house doesn’t slope away from the foundation. Even if the slope toward the structure is minor rain water will flow toward the house and slowly erode the concrete foundation until cracks occur.
You can deal with this problem in one of two ways. Either you add dirt to build up the slope or remove dirt to lower the slope around your house. Both of these options will cause the water to drain away from the foundation. The slope should drop 1 inch for every 1 foot away from the home, for at least the first 5 feet. When adding new soil to improve the slope, you should keep at least 3 inches of your foundation visible above the dirt so that it doesn’t come into contact with the siding or wood.
2. Egress Window Well
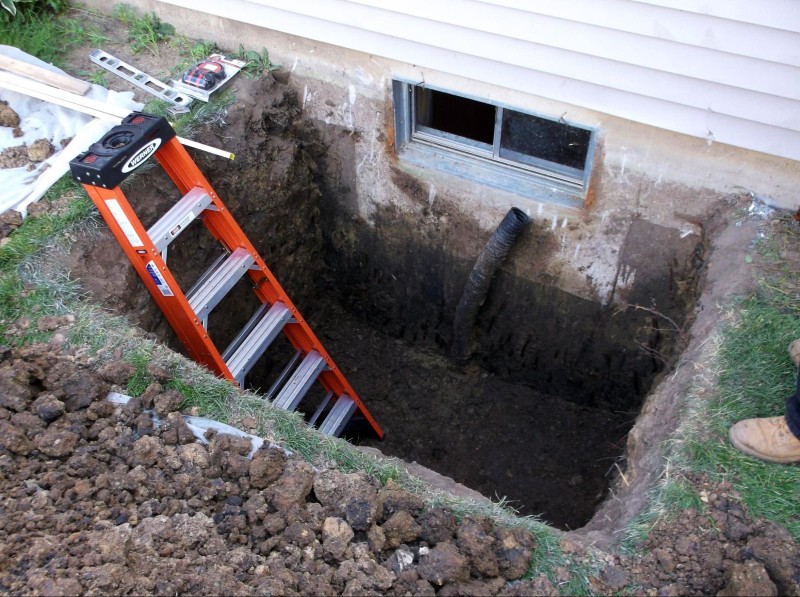
If regrading around your home foundation doesn’t work then you could install an egress window. This is especially true if your current window is old or leaky. Even if there are no water problems, an egress window still offers its own benefits, such as natural light and a safe escape route in case of a fire. There are many steps for installing an egress window, but here we will cover what you need to know before removing the dirt. The exterior window well should be at least 3 feet in width and length, and 44 inches in depth. The barriers of the hole should be 12 inches away from the window well, as you can see in the picture below.
3. French Drain Installation
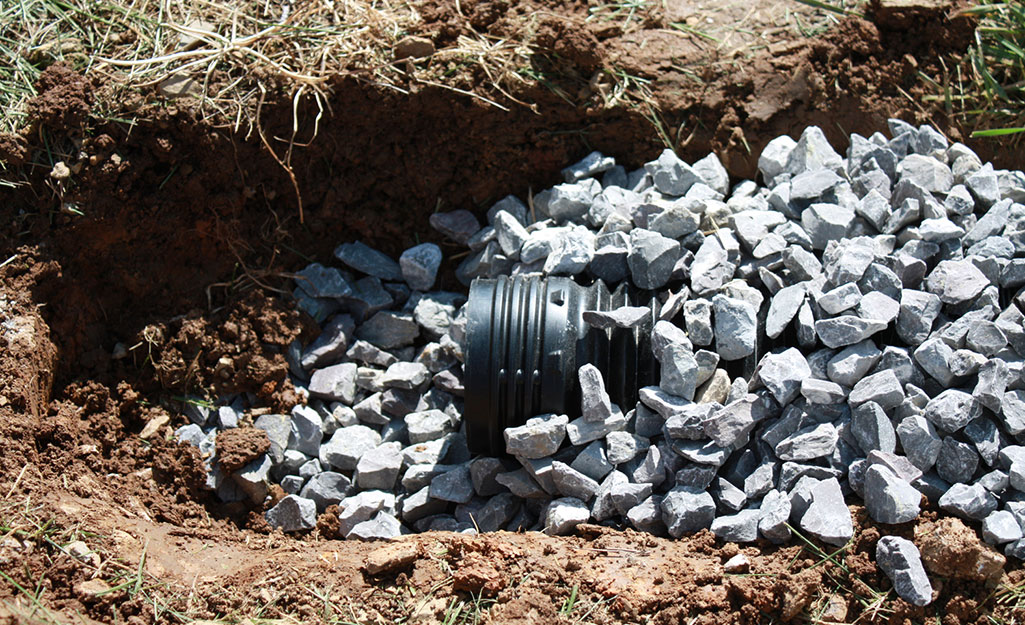
The final water drainage problem that can be solved by hand digging is by installing a french drain. A french drain can help you avoid water pooling up in your yard. The first step is to dig a trench. The trench should be 18 inches deep, 10 inches wide, and have a slight downgrade slope of 1 inch for every 10 feet. The next step is to install filter fabric in the trench and then cover it with a shallow layer of gravel. The final step is to set your drain pipe in the trench, fill the rest of the trench with rocks, and cover it with the remaining dirt. See the image below for reference.
4. Bury Cables or Electrical Wires
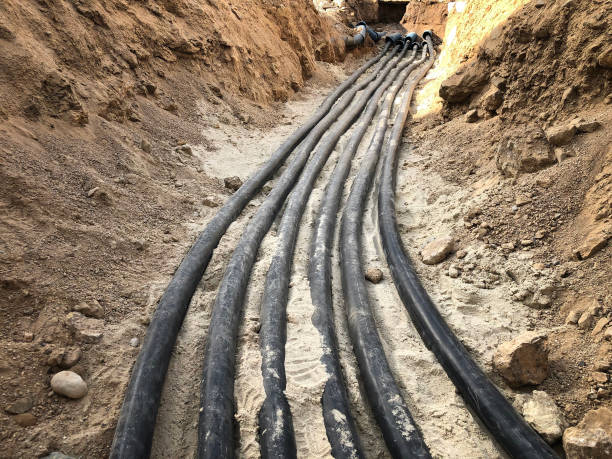
Let’s say you don’t have a water problem, but rather want to install a sauna on your back patio. That will require an electrician coming out to bury the cable wires underground. A PVC conduit should be buried 18 inches deep, whereas GFCI protection only needs to be 12 inches below ground level. The electrician will usually be fine with the homeowner digging the trench for them, but you shouldn’t try to connect the wiring unless you are a licensed and certified professional.
5. Dead Grass Removal
There are a few scenarios why you might need to remove dead grass. You have a dog that urinates all over your yard. Your snow plow service accidently tore up patches of grass by your driveway. You went overkill (no pun intended) with pre-emergent spray to get rid of weeds in your lawn. Moles and other rodents that burrow underground. The best way to remove dead grass is with a sod kicker. A spade shovel works as well but it’ll take longer that way and will be more labor intensive. Three options for where to dispose of the excess sod and dirt will be explored later in this article.
6. Fence Post Hole
Building a fence can be a good idea if you want to keep your kids or pets in your yard where there’s safety, and create separation from your neighbors. Once you’ve marked your post hole locations, dig down deep so the fence posts are securely anchored into the ground. As far as depth is concerned, a good rule of thumb is that the post hole should be roughly 1/3 as deep as the fence is tall. For example, a 9 foot tall fence should have a 3 foot deep hole. The best way to dig is to use a hand held post hole digger or a power auger.
Trench Depth: Measure Twice, Dig Once
The depth and width for the trench depends on what your purpose is for digging. Some examples are, an egress window well requires a much deeper trench than a french drain. A fence post hole will be narrow and deep while dead grass removal will be wide and shallow. In any case, it’s essential for you to measure twice so you only need to dig once. If you don’t do your due diligence on the front end, you’ll find yourself needing to either add or remove more dirt. If you are going to err on one side or the other, it’s easier to take dirt out than to put dirt back in.
2 Digging Methods: Manual vs. Machinery
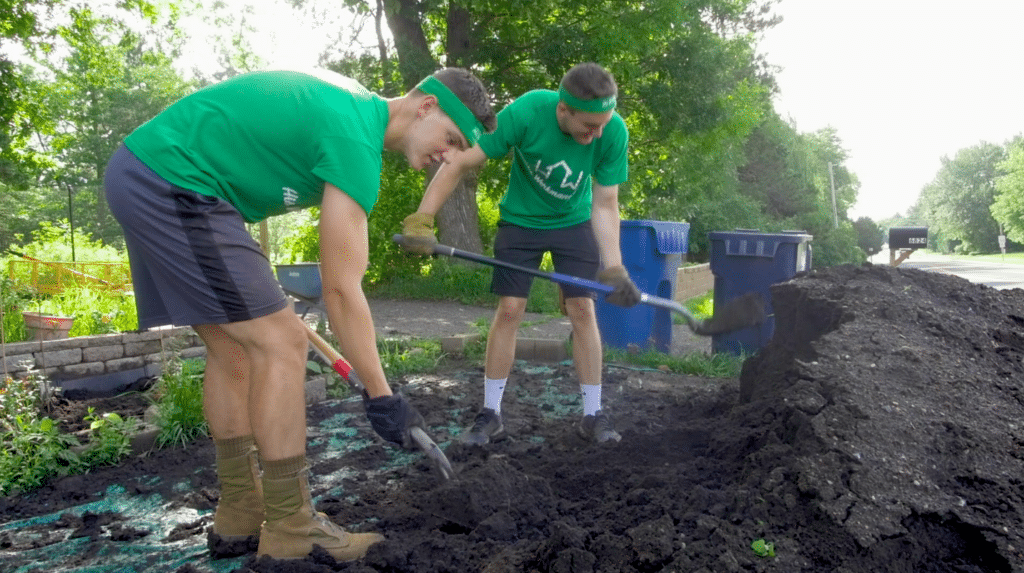
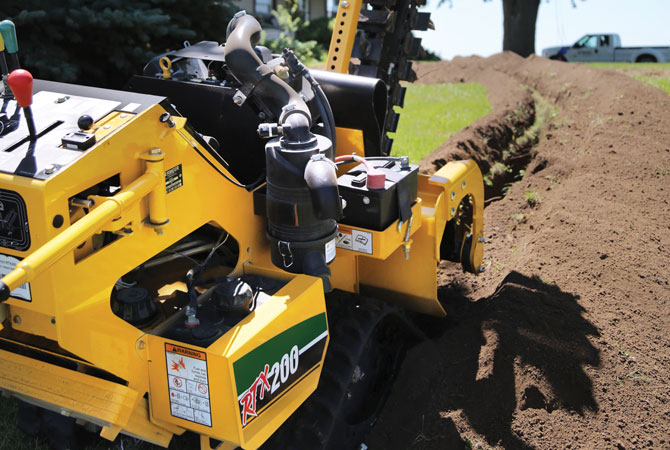
Now that you’ve learned why you might need to start a digging project, let’s turn our attention to the how question. There are two common methods for how to dig. Hand excavation is often contrasted with mechanical excavation. The former is digging manually, with shovels and pickaxes. The latter uses heavy machinery; like a trencher, backhoe or an excavator. For smaller digging projects (like the 6 scenarios mentioned above), it’s best to do it by hand as you get more precision and won’t make a big mess. For bigger excavation needs, you’ll need to use heavy machinery as that will get the job done much faster.
1. Hand Excavation
What are the pros and cons of manual digging?
- More Precision
- Less Mess
- Cheapest Option
- Slow Progress
- Unskilled Labor
- Uneven Cuts
2. Mechanical Excavation
What are the pros and cons of using power equipment?
- Fast Progress
- Professional Labor
- Straight Cuts
- Less Precision
- More Mess
- Expensive Option
What about the condition of the soil?
It’s almost impossible to know what condition the soil is underneath the area you need to dig. Nevertheless, the soil condition will determine what the best tools to use are. If the ground has rocks or gravel mixed in with the dirt, then you’ll need to use a pickaxe to break it up. A spade shovel or trench shovel won’t get the job done in an efficient manner. There will usually be clay once you dig 1-2 feet beneath the earth’s surface. This will make manual digging slightly harder work. If the dirt is wet, then you should be prepared to clean off your shovel periodically, as the soil will stick to it and weigh it down.
What needs to be done before digging?
There are dangers associated with digging because you never know what’s underneath the ground. That’s why it’s essential to call your local digging hotline before you start. They will come out (usually within 2-3 days) to mark the utilities. This won’t cost you a thing! They will use special tools to identify gas lines, electrical wires, water pipes, internet cables, invisible dog fences, and so forth. They will mark these lines with colored flags and spray paint. This will be useful to encourage safe digging at residential homes and prevent any accidents from occuring. The last thing you’d want is to pierce through a cord with your shovel.
7 Strategies for Digging a Trench
We’ve finally arrived at the “meat and potatoes” part of this article. Everything discussed up to this point is valuable information, but the most important part is having practical strategies for actual digging. Below you’ll learn 7 concrete takeaways that I learned over my years of experience.
1. Pick Suitable Hand Tools
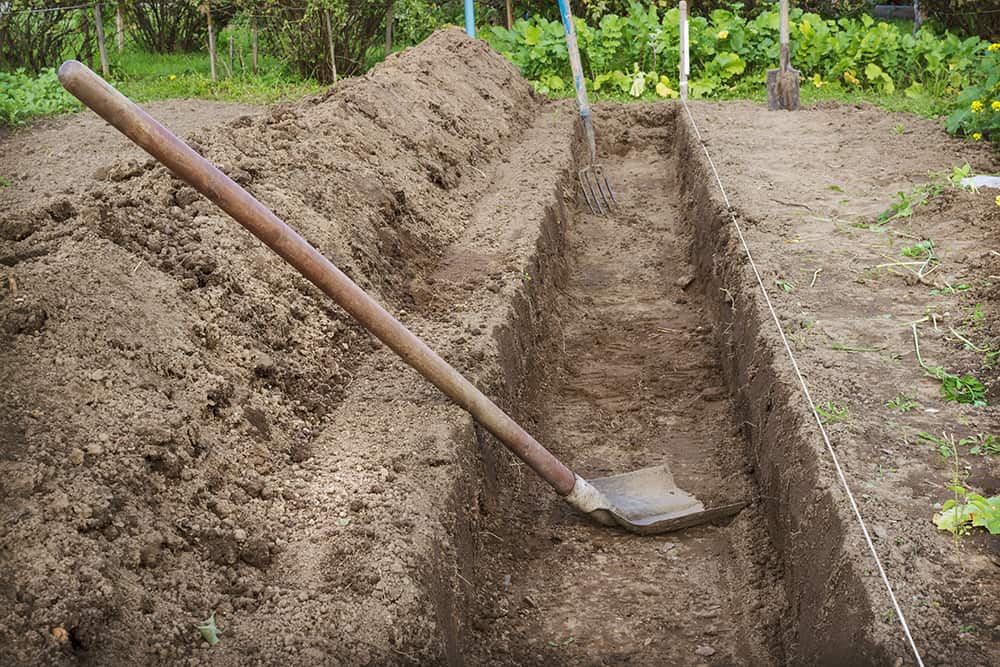
Since most residential digs can be accomplished by manual excavation, let’s assume your digging project is relatively small and will only require hand tools. What tools should be chosen? Your bread and butter will either be a spade shovel or a trench shovel. A spade shovel will get more dirt per scoop and so will make things go quicker. A trench shovel is about twice as narrow so it will give you greater depth, but less quantity of dirt per scoop. As an insurance policy, you should also have a pickaxe and loppers handy. More on that in the following point.
2. Prepare for Unforeseen Obstacles
It’s not uncommon for you to run into tree roots while you’re digging. Unless the roots happen to be very small, like 1/2 inch in diameter, you won’t be able to cut through them with a shovel. That’s why having a lopper is a good insurance policy. You’ll be able to clip right through the root in a matter of seconds.
Another unforeseen obstacle to prepare for are boulders. These are big rocks usually found more than 1 foot under the surface. You can use a crowbar to try to wedge the boulder out and dislodge it.
3. Use Your Foot to Leverage Body Weight
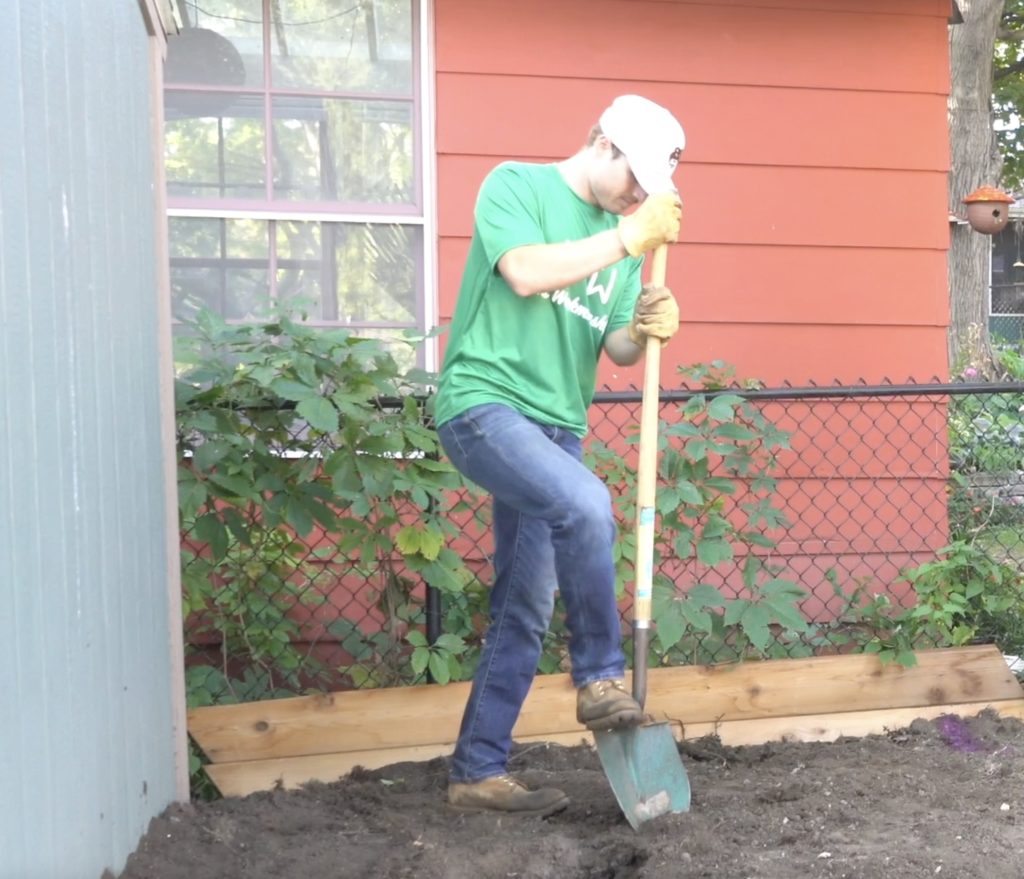
This strategy will help make shoveling less painful. If you don’t use your foot to push down the shovel into the ground, then you’ll put unnecessary stress on your upper body, specifically your back. That’s why it’s recommended to leverage your body weight by using your dominant foot to stomp the shovel head into the dirt. After doing this, you should push the handle down toward the ground so that the dirt comes up. This is the most physically efficient way to dig holes and trenches.
4. Distribute Workload in Manageable Amounts
It’s not enough to merely have good form when digging. In addition to proper posture, you should space out the labor into manageable durations, with a break every 30-45 minutes. Be sure to drink water and eat a snack to refuel your body. This is a general rule of thumb and will vary based on how good of shape you’re in and how hot the weather is.
5. Choose Optimal Weather Conditions
Speaking of the weather, it would be wise to look at the forecast prior to starting your digging project. It would be near impossible to dig when the ground is frozen due to cold temperatures, and when it rains mud will get stuck to your shovel. Since manual digging is very labor intensive, you’ll want to avoid heat that is in excess of 90 degrees. Make sure to dress in short sleeves and a t-shirt to give your body a chance to air out your sweat.
6. Coordinate Project Completion to Align
For many digging projects, dirt removal is only half of the work because the soil will need to be put back in place. Two of the six reasons for digging mentioned above, french drain installation and burying cables or wires, involve backfilling the trench with the original dirt. Before that can be done, the electrician will need to install the underground cables. Don’t forget to align the completion of the project with the arrival of the electrician.
7. Select an Appropriate Location
You will want to make sure the digging area is located on your residential property. It’s illegal to dig on public or private property without permission. If you plan to install a fence, have the property lines marked if you’re unsure so you don’t dig post holes on your neighbor’s lot.
Perhaps you want to dig a garden plot but you don’t know the best place for it to go. Consider how much sun your plants require and how the water drains on the land.
Now that we’ve explored 7 strategies for digging a trench, we should look at how to get rid of the extra soil. After we’ve done this, we will conclude with some bonus content about how much money landscape companies charge for trenching services.
3 Ways to Dispose of Excess Dirt
After you’ve successfully followed all these strategies the dirt will be removed from the ground, but you’ll still be left with a massive pile of soil. What on earth (no pun intended) are you going to do to get rid of that big dirt pile? Here are 3 things you can do with the leftover pile, ordered from least to most expensive.
1. Fill a Garden Bed
Repurposing the leftover soil for another project is usually the most economical and environment friendly. There are two primary ways to do this. The first is to use the soil to fill up a garden bed. You might think that hard clay-like dirt wouldn’t work for something like this, but that’s not entirely true. So long as the clay is on the bottom half of the garden bed, then you can buy nutrient rich soil to lay on the top half. Plants and vegetables will grow just fine in that type of environment.
2. Build a Berm
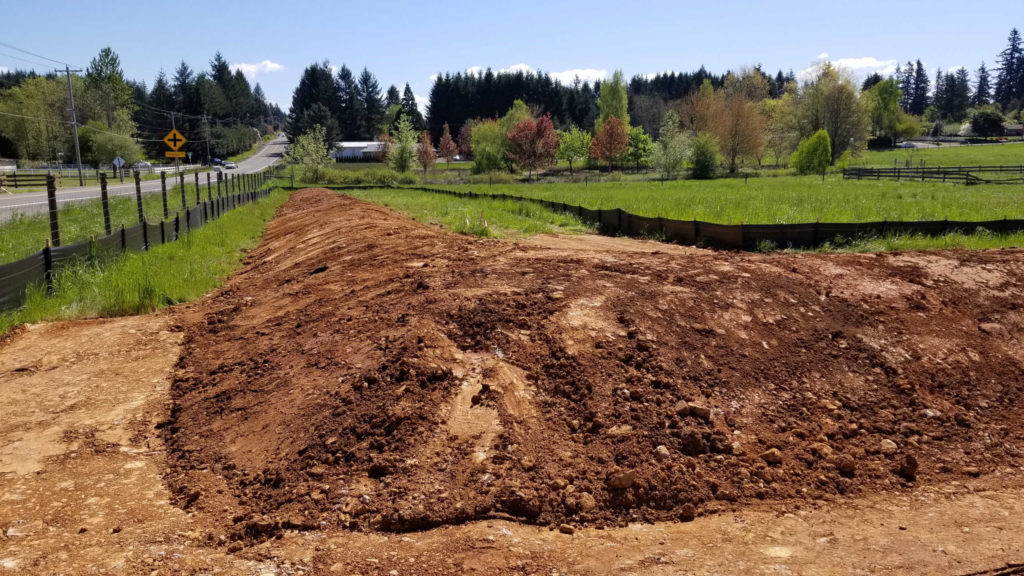
A second way to reuse the excess dirt is by building a berm. I did this on my own property several years ago. There was about 12-15 cubic yards of dirt leftover from a patio excavation and installation project, so I used it to build a berm in my backyard. That choice saved me the expensive haul away fee, and also visually enhanced the landscape by offering a beautifully shaped berm. Two benefits for the price of none!
3. Haul to Yard Waste Site
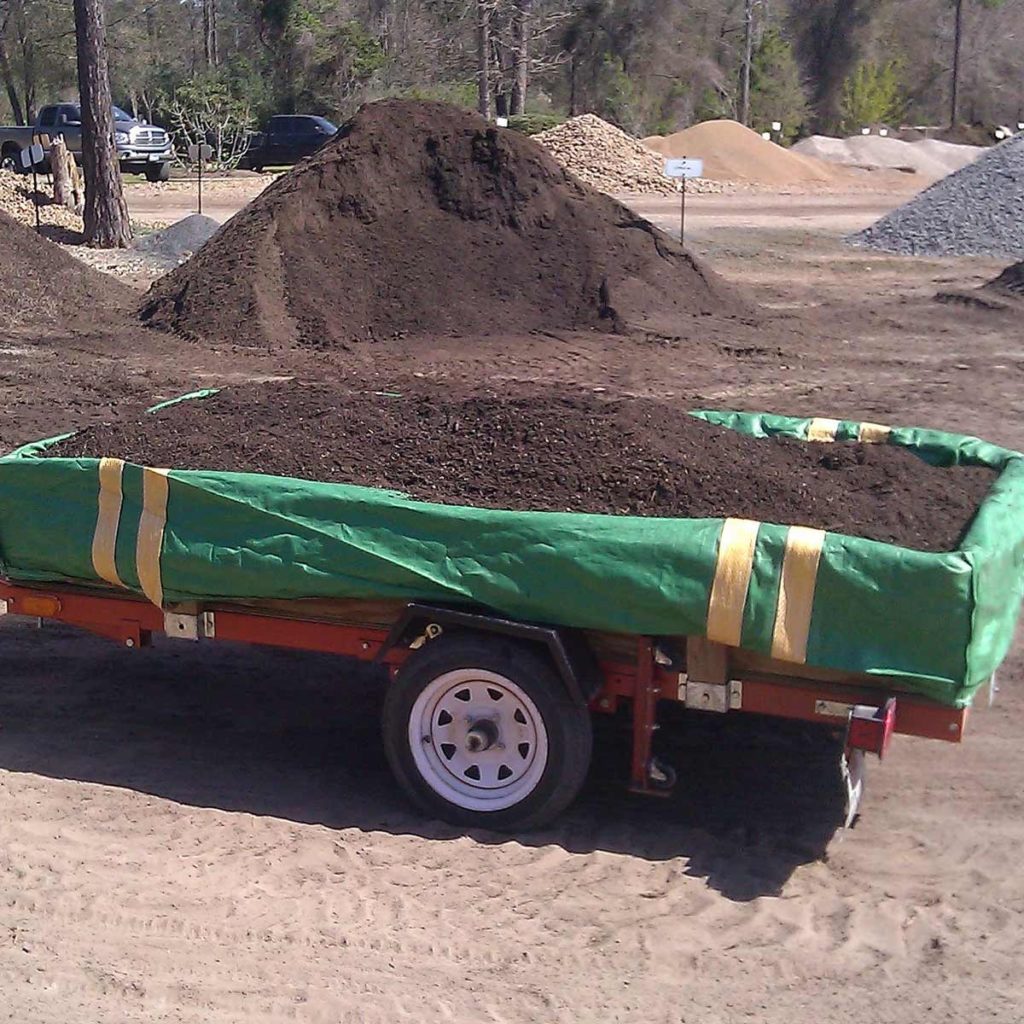
If neither of these options work and you cannot think of another way to put the soil to good use, then you’ll need to dispose of it. If it’s a small amount of dirt, like 1-2 cubic yards, then you can use a standard size pickup truck for the hauling. If it’s any more than that, you’ll want to rent a trailer. A utility trailer will be cheaper, but you’ll need to manually unload the dirt. A dump trailer will cost a bit more, but you’ll only need to load the dirt as it will dump with the push of a button.
You should be able to find the nearest yard waste site or landfill with a quick google search. Some drop-off sites charge by the amount of dirt, while others charge by the size or weight of your vehicle. If you’re lucky, you might be able to find a place that accepts dirt without any fee. The more time you spend searching, the more likely you’ll be to find the best deal near you.
Conclusion
In this article we investigated six reasons why you might need to start a digging project, the importance of getting the dimensions right, and comparing hand excavation to mechanical excavation. We learned why it’s crucial to identify the soil condition and to get the utility lines marked. We looked at seven strategies for digging a trench and three ways to dispose of the extra soil. Hopefully by this point, you’ve gleaned several insights that will be useful. Now is the time to apply what you’ve learned by tackling your digging project. It’s gonna be a big undertaking, but at least you’ve prepared yourself with a game plan by reading this blogpost.
Bonus: Trenching Services Cost
But what if you don’t have the time to do this yourself? What if you’d rather hire trenching services near you to take care of it? Well, if that’s your plan, then the next step is to look at your budget and get a customized estimate from a professional digging company. The overall cost for digging services really depends on the job requirements. It’ll cost more if the digging scope is beyond what can be done by hand. In that case, mechanical excavation will be required for dirt removal. It won’t cost as much if you just need hand excavation with shovels. Some trench digging services charge by the hour and rates range from $45 – $50 per hour per person. Click here to get a free trench digging quote from His Workmanship, or click here to learn more about our digging process.
Play


